Thursday, April 29, 2010

Final Project Update #3

Some new random images I had to paint in Photoshop:

Hands. We'll see if I actually use all those fingers.


Various views of the hood. That lumpy thing is her sitting down...


An updated version of the girl's clothes. I added a pattern.

Wednesday, April 28, 2010

Final Project Update #2


I have painted a couple backgrounds for my animation in Photoshop. The files are HUGE because I wanted to be able to only use portions of the same painting throughout the animation. I am prepared to take any shortcut. :)

A starry sky.

This is the jpeg file, so its quality isn't as good as the one I will use. And it's huge. It's made of a couple layers: the blue/black layer, which I used the burn tool with the leaf brush selected on a blue square, and then a stars layer. I made little white dots with a soft brush, then went over them in an air brush. I'll have to figure out a way to make them 'twinkle' in After Effects.


Grassy field. Look at it in full view to see the detail.

Again, this is a jpeg so the quality isn't as good, and that sky in the background will be replaced with a piece of the sky canvas I made at the top.

Here you can see some of the grass brushes I made in order to paint it:

And some rocks:
The pieces that make up the girl (you can't see the eyes because they're white, obviously):


And what the girl will look like (roughly):

Today I am working on the dog and random pieces like a couple of hand positions, sleeves, and some different angles of the girl's face. My goal is to get all of the painting stuff done this week so that I have all next week to animate and do special effects, and that weekend add sound fx and maybe some music. Of course, this is the goal and there's always some kind of wrench thrown into the system. We'll see, we'll see...

~Becca

Wednesday, April 21, 2010

Final Project: Update #1

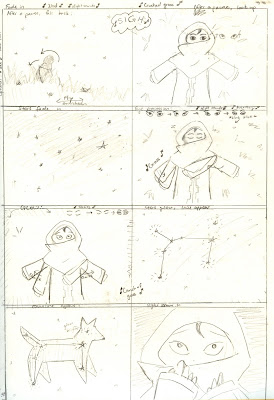
Tada! Storyboards.

Page 1
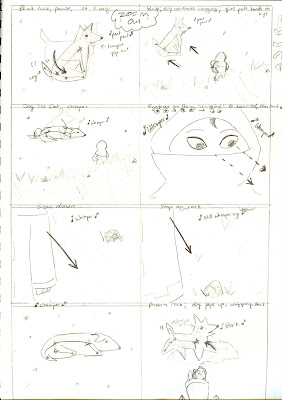
Page 2
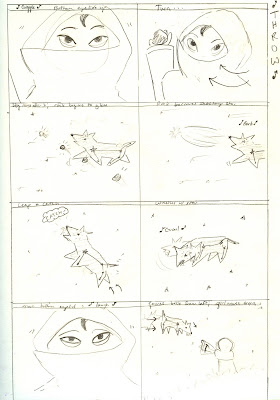
Page 3
...she looks kinda drugged in the second to last panel...
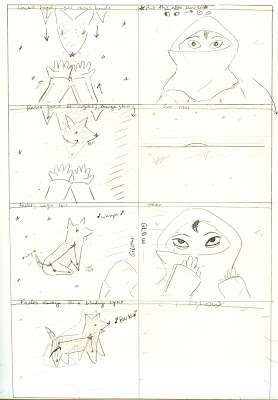
Page 4
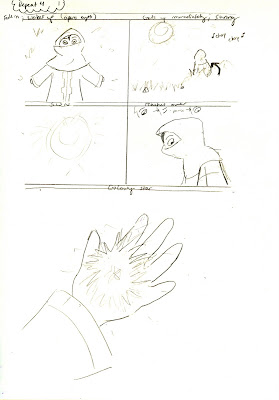
Page 5 Yay for happy endings.

This should have been posted hours ago, but I could NOT for the life of me find a scanner to use/work. (I don't own one.) Needless to say, I finally found one.

My final project is going to be a short animation about a girl and a dog constellation. Sound a little weird? Yes. Yes it is.


Basically, the story goes like this: a little shepherd girl (or something) falls asleep late at night while tending her sheep, when she is awakened by some glowing stars. Suddenly, the very constellation she was looking at only seconds before comes to life as a living dog. (It's Canis Major.) She is a little scared at first, but sees that the dog just wants to play. So she throws a rock for it to catch. Once it hits the sky, the rock turns into a shooting star, and the dog catches it. He returns it to her, but just before he can drop it into her hands, the sun begins to rise. The dog fades away, leaving the little girl very sad. Everything is enveloped in a white light, and the girl wakes up in the same position she had fallen asleep in earlier. Thinking it was just a dream, the girl seems sad, but then notices the glowing star next to her feet, where before it had been just a rock.

There are a lot of little scenes I would like to have added to my storyboards, but I know I need to limit myself so I'll get this done on time. If I do end up having time, I want to add a couple other constellations. For example, when the dog first awakens and keeps barking, I want Pisces (the fish) to awaken, swim around its head to shush him, then fade away again. Or, when the dog is chasing the shooting star, it runs into another constellation, like the bear or cat or something meanish. After being growled at, they disappear, and the dog limps away with its tail between its legs back to the girl. I know all of this would be very difficult to do in the amount of time I have, so that's why I have made it "optional."

So, to follow my storyboards, start from left and go to the right. It may seem confusing because I tend to sketch the previous positions of the characters behind the solid sketches of current positions. That way I have an idea of where I should place the pieces of the characters.

Having said that, I will be using After Effects to puppet the characters, though I'll make their pieces in Photoshop. I'm still trying to decide if I would like to use different textures on different pieces, such as fabric texture on the girl's clothes, or granite on the rocks. The hardest part will be creating the constellation. My idea right now is to outline it in white and fill it with a somewhat transparent layer of stars, just so that there is a little contrast between it and the sky around it.

Now is the time to get to work! :) In the meantime, enjoy some character sketches...

~Becca


Canis Major. The big part of the constellation is the Dog Star, Sirius.

Puppy. I was debating just making up my constellation for awhile there.


This girl was SO HARD to figure out. I knew I wanted some kind of face covering, so I had to do all sorts of research about hijabs, burqas, head scarves, you name it. It was kinda cool, actually. I felt this design was too formal.
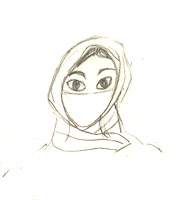
Too ninja.
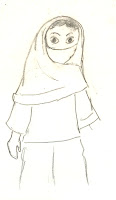
I was reeeeally close to using this one.

There she is! I settled on this design, though I tried to make her look a bit older, like the previous sketch. Hope you enjoyed!


Wednesday, April 14, 2010

Assignment 9: Particle Effects


Something strange is going down on Main Street...


First of all, I need to give Videocopilot.net credit for helping me make this with their wonderful tutorials. (And of course, thank you Ben for teaching me, well, everything!) Between what I learned in class and this website, I have learned a ton more about particles and how they work than had I tried everything on my own.

Here we have some kind of energy tornado thing. It doesn't make sense, but I wanted to make something look kinda cool. I noticed videocopilot.net had a tutorial on energy and decided to try it out.

There are several particle effects in this: the tornado is a 3D layer (with a camera, of course) of twirling tripolygons with a feathered mask over it, there is a circle of tripolygons being sucked into a hole underneath that, there are "trash" particles blowing all over the place (movement of that was randomized), there are layers of "small bubbles" and "large bubbles" at the base of the tornado that utilize a puff of smoke jpeg I found, and the glowing, flickering base of the tornado is made up of two circles with the wiggler added to its opacity. That's right, I used expressions! The final layer is a black mask, which I tampered with the color correction to make the original photo of Taylor, Texas' Main Street look darker and creepier. Finally, I made all the layers into a new composition and added the camera shake (wiggler). Keep in mind, I did color correction ('curves,' to be exact) on virtually all of the layers.

I'm pretty excited about what I was able to do on my first try. My only complaint is that the bubbles didn't come out quite as I had hoped. I really wanted to make this sphere of shifting energy at the base of the tornado, kind of like on the original Terminator. Other than that, I really liked how this one came out. It's kind of creepy!

~Becca

Tuesday, April 6, 2010

Assignment 8: Green Screen Exercise


Wingardium leviosa! A short green screen exercise. Like my oh-so-realistic feather??

WELL, what to say about this... First I used a couple garbage mattes to get rid of the exposed walls around the stage. I used Keylight 1.2 in After Effects to key out the green, soften up the edges, color correct, and a bunch of other things. I tried really hard to get those dang edges to clean up, but it just wasn't going to work. You can see a nasty gray line all along my right side - especially on my pants - and my face was super shiny that day (I guess it was hot...?) and was thus spilling green all over the place. It took me forever to make sure my face wouldn't disappear whenever I turn it. Ah, well. It was my first time. I added a light in After Effects to try and brighten my right side up a bit to match the background a little better. It wasn't till after I uploaded it that I realized that the shadows don't match between the footage and the background. :P And of course YouTube decided to cut off my disappearing act at the end. I really just need to take the time and upload everything on Vimeo!

Enjoy!

~Becca